
Tel: (239)208-6915


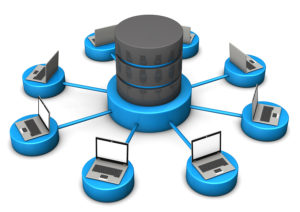
Fast Count Self Service Automated Count System
*Please Note: Fast Count requires the Internet Explorer browser
Synergy Marketing Group now offers our self service online count and order portal that we refer to as Fast Count.  We recommend  that you take a few moments to register for access to the Fast Count system.  Once your username and password have been emailed to you simply log-in, choose your  list category, or sub-category,  then begin to add/omit specific filter requirements, execute your count, and soon you will be able to place your order, and receive automated file delivery via email 24 hours per day/365 days per year.
In today’s database marketplace there are not many systems that allow the end user to log in, create their own set own filters, refine through search through further quality filters and omission requirements until you have targeted your ideal customer or prospect .
Fast Count Offers Several Type of Databases :
Getting Started
Don’t forget – scroll down to the bottom of each screen!
Note: When you check your selects, you have 3 choices for each: output (code prints on your output file), omit, and/or select.Anytime you select a demographic element it is automatically marked for output.
10. When complete, Click NEXT. Go through all the select choices – only those you pick will appear. Again, be sure to scroll all the way down.
11. Next come your Quality choices. Always scroll down to the bottom of each screen. See the defaults (already checked): one per head of household, omit DNM(do not mail), non-deliverable, non-ZIP+4, etc. You may want to un-check some of these if you are  ordering a telemarketing list since mail-ability isn’t a requirement. If you want 100% phones — select phones here. (Note: Use output phones for “phone where availableâ€.) Click NEXT. Review quality set-ups. Click NEXT.
Note: When all your selects are complete, the system will show a review of all selections. You can build more segments by clicking at the left on new or copy segment, or submit count or modify count when you are ready. (All these buttons are in the blue column to the left or center top of screen.)
12. Count / Order screen. If you know exactly what you need — you can complete this whole screen or just do count portion. Respond to screen questions and click NEXT (you’ll get a count number). Click OK. There is absolutely no charge to run a count.
13. You will be returned to View History. Find your count number and notice it says submitted on the right. Press “Click to  Check Status†(blue button top left). That checks whether your count has finished. While you wait the next minute or two, look to the left on your count record. See the drop-down box. Click on select one . Click on copy. That will copy the first count and make a new line under History. When it appears, click the drop down box for that one and choose change. This brings you back to the geo screen. You can change some parts and resubmit the new count. To start a new count, click on start new count. To go to a different list, click on home.
14. Go back to View History Screen. Click the blue “Click to Check Statusâ€Â button. Your first count should say “complete†by now. If it does, click on the drop down box — click on invoice. This gives you your cost for the order. Click on display. You can print out the count here. Click on email. Fast Count will email you the count.
15. When you are ready to order, make any changes to count — add PO, Nth Select, Key code, etc. Rerun the count and then in the “Select One†box click on order to order the list. After the order comes back complete, it has been sent to the  designated email address.
Now play with a number of counts; experiment with the various selects and areas of the Fast Count System.
Click on HELP at any point. For additional system use tips or definitions of data selects — click on FAQ in Help from the main list select page.
You may also contact us with any questions, or initiate a live chat session for help.